How to Prepare a Product Photography Shot List
Map each product variant to the angles, channel and files your store needs. Use a sample shot list to approve the first item and spot missing images.
Quick Answer
Start with the Item the Customer Can Buy
A Worked Shot List for a Coffee Dripper
Name the Channel Before Choosing the Crop
Approve One Sample Before the Full Run
Quick Answer
A product photography shot list connects each variant to a view, destination and approval check. Test the first sample in a real product card before shooting the range. At handover, match each file to the colour and contents the customer can actually order.
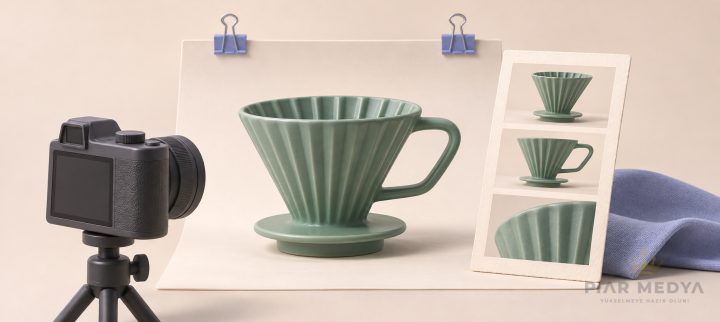
Two ceramic coffee drippers arrive at the studio in identical boxes. One is green, the other cream. The front views look lovely at full size, but nobody can tell which file belongs to which stock code. There is no view of the base, so a shopper still cannot tell whether the dripper will sit on their favourite mug. A shot list gives the photographer those decisions while the samples are still on the table.
Start with the Item the Customer Can Buy
Give each sellable variant a row. Write down its stock code, finish, colour and included parts. Attach the same code to the physical sample. If the new glaze is darker than the previous batch, ask for a photograph of the current sample. Renaming last season’s image will leave the shopper looking at the wrong product. Resolve differences between the catalogue and the sample using your variant and product data checklist before booking a full session.
Ask the person who answers product enquiries which detail people struggle to picture. The inside of a cup matters to someone comparing glazes. A buyer ordering a mounting plate may need to count the holes and check their spacing. Give each additional frame a question to answer. The number of photographs will follow from those questions and from where the files will appear.
A Worked Shot List for a Coffee Dripper
| Item and view | Destination | Approval check |
|---|---|---|
| DRP-G / main | Store card and product feed | Entire green dripper and handle in frame. Mug sold separately stays out of the shot. |
| DRP-G / underside | Detail gallery | Opening and resting surface visible. Dimensions appear as text on the product page. |
| DRP-G / in use | Gallery | Side view shows how the base rests on a mug. Caption explains which item is included. |
| DRP-C / main | Cream variant card | Cream sample at the same angle. Selecting cream displays this file. |
The underside shot earns its place because the customer needs to judge fit. Size can be hard to infer from a photograph, even with a familiar object nearby. Put the measured diameter beside the specifications. Capture a view of the actual base so the buyer can distinguish a broad flat rim from a narrow one.
Name the Channel Before Choosing the Crop
For a Google product feed, share the Merchant Center main image requirements with the studio. Use a clear picture of the variant on offer and keep promotional badges, added logos and price text off the main file. Other angles can go in the additional image field. Give a campaign banner with overlaid copy its own filename and destination.
Show the photographer a product card from the mobile store. An instruction such as “high resolution” tells them very little about where the edge of the handle will fall in a square crop. Try the first file at card size and in the detail gallery. The person preparing images for the product page can use the view column to tell a main shot from a close-up without opening every file.
Approve One Sample Before the Full Run
Agree the light, framing and finish on the first piece. Compare the green glaze against the sample under consistent light. Keeping the camera in position helps shoppers compare colours across variants. The Shopify product photography guide illustrates how to set up a surface, background and camera for a repeatable tabletop shot.
At handover, match every requested frame to a delivered file. Open a test product, select cream, then green, and look at what appears in both the gallery and the card. Return a correction against the stock code and view, with a specific instruction such as “show the entire base” or “replace with the cream sample.” If the images answer the fit question and shoppers still hesitate, look at other barriers on the product page, including delivery, returns and missing measurements.
FREQUENTLY ASKED QUESTIONS (FAQs)
Record the stock code, finish, view, destination and a visible approval condition. For a dripper, that condition might be a clear view of the base rather than a vague request for more detail.
Mark the sample and camera positions. Approve the first item under the intended lighting, then keep that reference beside the remaining samples. Check colours against the physical items.
The shopper should see the colour, pattern and distinguishing details of the variant they select. Match the delivered filename to that variant in the store and check the selection on a phone.
Use an in-use view in the gallery when it explains scale or fit. For a Google product feed, reserve the main image for the actual item on offer and keep unrelated props out.
Yes. Stabilise the phone, keep the light consistent and photograph one sample first. Judge it in the actual product card to see whether the finish and shape remain clear.
Send the same sample list, angles, background requirements and output formats to each studio. Ask who handles colour approval, retouching and a reshoot if a specified view is missing.